

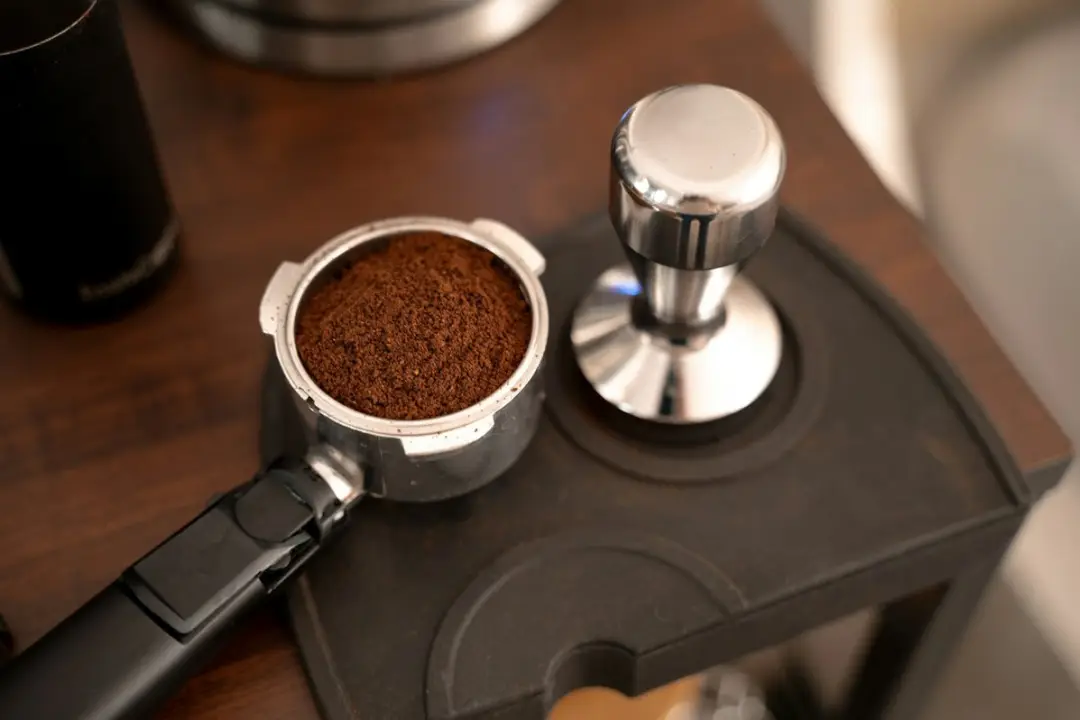
Making real espresso at home, the kind with proper crema, a rich body, and a clean finish, comes down to three variables: fresh beans ground correctly, water at 9 bars of pressure, and a 25–30 second extraction. Everything else in espresso making is dialling in those three. Skip the variables and you get sour or bitter shots. Nail them and you get café-quality espresso in your kitchen.
This guide walks you through making espresso step-by-step, the gear you need, the dose, the grind, the technique, and how to fix the most common mistakes. By the end, you’ll be able to pull a balanced shot consistently and have the foundation to make any espresso-based drink (cappuccino, latte, flat white) at home.
The short answer: espresso in 5 steps
- Grind 18g of fresh espresso beans to a fine consistency (slightly finer than table salt).
- Dose and tamp into a 58mm portafilter, level the grounds, then press firmly straight down.
- Lock the portafilter into the machine and place a scale + cup underneath.
- Start the shot. Aim for 36g of espresso in the cup over 25–30 seconds.
- Stop and drink immediately. Crema fades within 2 minutes.
That’s the whole process. Everything below is about getting each step right consistently.
What you need to make espresso at home
Essentials (non-negotiable)
- A real espresso machine with 9 bars of brewing pressure. See our best espresso machine guide, Breville Bambino Plus, Barista Express, or Gaggia Classic Evo Pro are the right picks for home.
- A burr grinder, espresso grind quality matters more than the machine. See our best coffee grinder guide. Skip blade grinders entirely.
- A digital scale with 0.1g resolution, under $15 on Amazon. You’ll weigh in and out.
- Fresh espresso beans within 4 weeks of their roast date, see our espresso bean recommendations.
- A 58mm portafilter (most machines include one, but the size matters).
Nice-to-have
- A WDT tool (Weiss Distribution Technique), pokes the grounds to remove clumps, around $20. Major shot quality upgrade.
- A naked/bottomless portafilter, lets you see channeling. Useful diagnostic.
- A puck screen, distributes water evenly across the puck for cleaner shots.
- A knock box, for tapping out spent pucks. Small but daily convenience.
The espresso ratio: 1:2 by weight
The standard espresso ratio is 1:2 by weight, 18g of ground coffee in, 36g of espresso out. Note this is weight in vs weight out, not water in vs water out. Espresso is measured by the liquid weight in the cup, not the water that passed through.
| Style | Ratio | Example (18g dose) | Best for |
|---|---|---|---|
| Ristretto | 1:1 to 1:1.5 | 18g → 18-27g | Intense, sweeter shots, milk drinks |
| Normale (standard) | 1:2 | 18g → 36g | Default for everything |
| Lungo | 1:3 to 1:4 | 18g → 54-72g | Longer, milder, more caffeine |
If you’re new to espresso, start with the 1:2 normale and adjust from there. Most cafés serve normale by default. The ristretto is what Australian and New Zealand cafés often use for flat whites, concentrated and slightly sweeter. For more on ratios across all brewing methods, see our coffee to water ratio guide.
Espresso grind size: fine and dialed in
Espresso requires a fine grind, slightly finer than table salt, much finer than pour-over. But the exact setting on your grinder depends on your beans, your machine, and the day. “Dialing in” is the process of adjusting grind size until your shots hit the right time + weight.
| Brew method | Grind size | Texture reference |
|---|---|---|
| Espresso | Very fine | Powdered sugar / fine sand |
| Pour over | Medium-fine | Table salt |
| Drip | Medium | Coarse table salt |
| French press | Coarse | Sea salt |
| Cold brew | Very coarse | Cracked peppercorns |
Dialing in: the 25–30 second target. Pull a shot and time it. If it pulls in under 20 seconds, the grind is too coarse, water rushed through. Grind 2-3 clicks finer. If it pulls in over 35 seconds, the grind is too fine, water choked. Grind 2-3 clicks coarser. Repeat until you consistently get 36g out in 25-30 seconds. Most home grinders take 3-5 adjustments per bean change.
Step-by-step: how to pull an espresso shot
- Pre-heat the machine. Turn on, let it heat for 15-20 minutes (depends on machine). Lock the empty portafilter into the group head while heating, keeps it warm.
- Weigh and grind 18g of beans. Grind directly into the portafilter (or into a dosing cup, then transfer).
- Distribute the grounds. Tap the portafilter to settle the grounds, then use a WDT tool or your finger to break up any clumps. Even distribution is critical, channels = bad shot.
- Tamp. Press straight down with a 58mm tamper using about 30 lbs of pressure (firm, not crushing). The grounds should be a level, compressed puck.
- Place a cup on the scale, tare, and lock the portafilter in. Have everything ready before you start, espresso waits for no one.
- Start the shot AND your timer simultaneously. Most machines have a button; many will pre-infuse (a low-pressure soak) before full extraction begins.
- Watch the flow. First few seconds: nothing or just drips (pre-infusion). Then: a thin honey-coloured stream emerges. The crema (golden foam) forms on top.
- Stop at 36g out or by hitting the button again. Total time should be 25–30 seconds. If you have a volumetric machine, set it to 36g programmatically.
- Drink within 60 seconds. Crema collapses fast. Espresso oxidises and loses character within minutes.
- Knock the spent puck out into a knock box (or your trash). Wipe the portafilter clean for the next shot.
Watch: fixing bad espresso at home
James Hoffmann’s “A Beginner’s Guide To Fixing Bad Espresso” walks through diagnosing sour, bitter and watery shots one variable at a time. Worth a watch as soon as your first shots start coming out wrong.

Troubleshooting: sour, bitter, weak, or strong
| Problem | Likely cause | Fix |
|---|---|---|
| Sour, watery, fast (under 20s) | Under-extracted, grind too coarse | Grind finer, 2-3 clicks at a time |
| Bitter, harsh, slow (over 35s) | Over-extracted, grind too fine | Grind coarser, 2-3 clicks at a time |
| Pale yellow with no crema | Stale beans or bad pre-infusion | Check roast date; ensure beans within 4 weeks |
| Black streaks (“channeling”) | Uneven puck, clumps or tilted tamp | Use WDT tool; tamp level |
| Crema dissolves in 30 seconds | Beans too fresh (under 7 days off roast) | Let beans rest 7-14 days from roast date |
| Watery + weak despite right time | Dose too low or grind ratio off | Check you’re using 18g; weigh every shot |
The most common mistake by far: **not weighing in or out**. Eyeballing a shot is the road to inconsistency. Use the scale every single shot for the first month. After that, it becomes muscle memory.
What to make next: espresso drinks at home
Once you can pull a consistent shot, you can make any espresso-based drink at home. The shot is the foundation; everything else is milk technique. Common builds:
- Americano: Pull a shot, add 6-8 oz of hot water. Drink black or with cream.
- Flat white: Double shot + 3.5 oz steamed milk with thin microfoam. 5-6 oz cup.
- Cappuccino: Single shot + equal parts steamed milk + thick foam. 5-6 oz cup.
- Latte: Double shot + lots of steamed milk + thin foam layer. 12 oz cup.
- Cortado: Shot + equal parts steamed milk, no foam. 3-4 oz cup.
- Mocha: Latte + chocolate syrup or melted dark chocolate.
- Macchiato: Espresso with a dollop of foam on top. 2-3 oz.
The bottom line
Real espresso at home isn’t about expensive gear, it’s about dialed-in fundamentals. 18g in, 36g out, 25-30 seconds. Fresh beans. A burr grinder. A scale. With a $500 Breville Bambino Plus, those tools, and 2-4 weeks of practice, you can pull shots that match what your local third-wave café serves. The first dozen shots will be terrible. The next dozen will be drinkable. By month two, you’ll be pulling shots your friends ask you to make them.
Wondering how espresso actually differs from regular coffee? Our espresso vs coffee breakdown answers the caffeine and flavour question, and our cold brew vs espresso comparison covers the other drink everyone stacks it up against. Ready to upgrade? See the best home espresso machines, or for a budget workaround, our espresso-style French press method. More on espresso drinks across the site.
Frequently Asked Questions About Making Espresso at Home
The standard espresso ratio is 1:2 by weight, 18 grams of ground coffee in, 36 grams of espresso out. Ristretto is 1:1 to 1:1.5 (more concentrated). Lungo is 1:3 to 1:4 (longer, milder). For most home setups, start with the 1:2 normale and adjust based on bean and taste. Always weigh both input and output, eyeballing leads to inconsistent shots.
25 to 30 seconds from the moment you start the pump to when you stop at 36g out. Under 20 seconds means the grind is too coarse, water rushed through, shot tastes sour. Over 35 seconds means the grind is too fine, water choked, shot tastes bitter. Adjust grind size 2-3 clicks at a time to dial in.
Yes, absolutely, unless your machine has one built in (like the Breville Barista Express). Pre-ground espresso loses freshness within days, and the grind size needs to be adjusted constantly. A burr grinder is essential; blade grinders won’t work. Spend more on the grinder than the machine if you have to choose, see our best coffee grinder guide for picks.
Any high-quality whole-bean coffee within 4 weeks of its roast date works. Espresso-specific beans are usually medium-dark to dark roasts with chocolate, caramel, or nutty notes, they handle the high-pressure extraction without going bitter. Avoid light roasts for your first espresso bag (they require fine-tuned technique). See our best beans for cappuccino guide for solid espresso bean picks.
Around $700-$1,000 for a complete entry-level setup: $500 espresso machine (Breville Bambino Plus) + $170 grinder (Baratza Encore ESP) + $15 scale + $20 tamper + $20 milk pitcher. You can spend much more, but going below that range usually means cutting corners on the grinder, which hurts cup quality more than any other variable.
About 2-4 weeks of daily practice to make consistent drinkable shots. Another 1-2 months to make café-quality shots. The first dozen attempts will be sour or bitter, that’s normal. The variables you’re balancing (grind, dose, distribution, tamp, time) take repetition to internalize. Weigh every shot during the learning curve.
 Austin Barker
Founder & Lead Editor
Seven years behind a bar before starting Brewing Coffees. Writes most of the equipment coverage and tests every machine on this site in an ordinary home kitchen.
Austin Barker
Founder & Lead Editor
Seven years behind a bar before starting Brewing Coffees. Writes most of the equipment coverage and tests every machine on this site in an ordinary home kitchen.