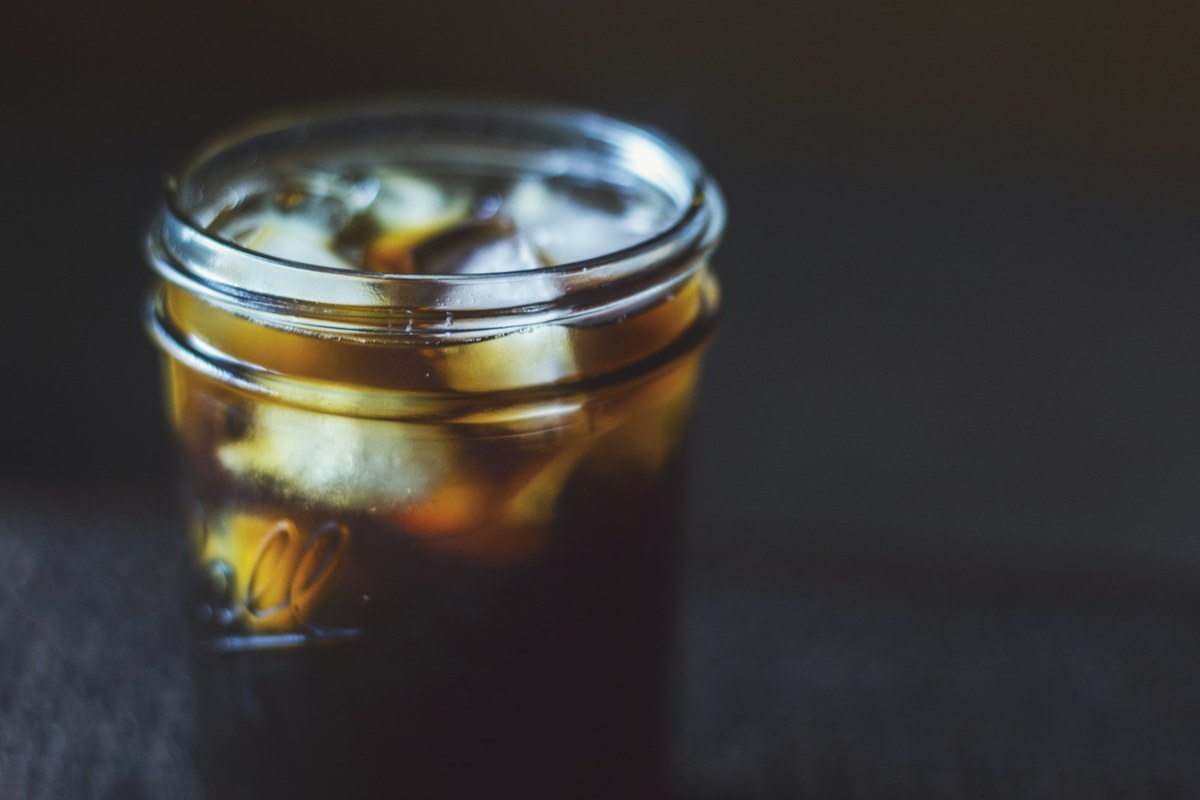
Cold brew coffee is one of the easiest brewing methods to master at home — coarse-ground beans steeped in cold water for 12 to 24 hours, then filtered. No machines, no heat, no rushing. The result is a smooth, low-acid coffee concentrate you can dilute over ice, mix with milk, or sip neat.
Most people overcomplicate it. The truth is you only need three things: good beans, a coarse grinder, and patience. This guide walks you through the exact ratio, grind, steep time, and gear we use, plus how to scale it up, store it properly, and troubleshoot the common mistakes that lead to weak or bitter cold brew.
The short answer: cold brew in 4 steps
Before we dive into the details, here is the entire cold brew process in four lines:
- Grind: 1 cup of coffee beans to a coarse, sea-salt texture.
- Combine: Add to a jar with 4 cups of cold, filtered water (1:4 ratio for concentrate).
- Steep: Cover and refrigerate for 16 hours.
- Filter: Strain through a fine-mesh sieve and a coffee filter or cheesecloth.
That is it. The detail that follows is about why each step matters and how to adjust for taste, batch size, and the gear you already own.
What you need to make cold brew at home
You can make cold brew with almost nothing — a mason jar, ground coffee, and a strainer. Or you can buy a dedicated brewer that handles the steeping and straining in one container. Both work. The difference is convenience.
The bare minimum (free if you have it)
- A large jar (1 quart / 1 litre or bigger) with a lid
- Coarsely ground coffee
- Cold, filtered water
- A fine-mesh strainer plus a coffee filter, paper towel, or cheesecloth
- A second clean jar or bottle for the finished brew
This is the classic mason jar method. It costs nothing if you already own a jar, and it produces cold brew that is functionally identical to what comes out of a $50 dedicated brewer. The trade-off is that filtering is fiddly — you will need to strain twice to remove the fine sediment.
The convenient upgrade (a dedicated cold brew maker)
If you make cold brew weekly, a dedicated brewer is worth it. They have a built-in mesh basket that holds the grounds, so you skip the messy straining step entirely. Three we recommend:
The Takeya Patented Deluxe Cold Brew Coffee Maker is the most-recommended option for a reason. It is BPA-free Tritan plastic (so it survives drops), has an airtight lid that lets you brew on its side to maximise grounds-to-water contact, and the mesh filter is fine enough that no second straining is needed. 1-quart and 2-quart versions are available.
The OXO Good Grips Cold Brew Coffee Maker is the premium pick. It uses a “rainmaker” lid that distributes water evenly across the grounds, and the bottom releases the finished brew through a paper filter into the carafe below. Cleaner cup, more counter space.
The Hario Mizudashi Cold Brew Pot is the elegant glass option for people who want something that looks good in the fridge. Same idea — a removable mesh filter inside a 1-litre pitcher — just prettier.
For first-time brewers we suggest the Takeya. It is the most forgiving, the easiest to clean, and the side-brew design genuinely does extract slightly more flavour than upright methods.
Choosing your beans for cold brew
The single biggest variable in cold brew flavour is the bean. Because there is no heat to extract bright, acidic notes, cold brew rewards beans that have richness, body, and natural sweetness — usually medium to dark roasts with chocolate, caramel, or nutty notes.
Light roasts are not wrong, exactly, but they can taste flat and tea-like when brewed cold. Save your bright Ethiopian or Kenyan beans for pour-over. For cold brew, reach for Brazilian, Colombian, Sumatran, or any blend marketed as a “dark roast” or “French roast”. For our full list of bottle picks, see our guide to the best beans for cold brew.
Freshness matters less for cold brew than for espresso, because the long steep time masks subtle differences. But beans within 4–6 weeks of their roast date will still produce noticeably better cup. Check our guides on how long after roasting beans are at their best and how to tell if beans are fresh if you are unsure.
The grind: coarse, like sea salt
Grind your beans to a coarse texture — about the size of sea salt or breadcrumbs. Coarser is the single most important variable people get wrong.
Here is why. Cold water extracts much more slowly than hot water, so the contact time is long (12–24 hours instead of 25 seconds for espresso). If your grind is fine, the prolonged contact pulls out bitter compounds and leaves you with sludgy, over-extracted coffee that no amount of milk can save. Coarse grounds extract evenly and slowly, exactly what you want.
| Brew method | Grind size | Texture reference |
|---|---|---|
| Espresso | Very fine | Powdered sugar |
| Drip / pour-over | Medium | Table salt |
| French press | Coarse | Coarse sea salt |
| Cold brew | Coarse | Coarse sea salt / breadcrumbs |
If you do not own a grinder, ask your local coffee shop or grocery store to grind a bag for you and specify “coarse, for cold brew” — they will know exactly what you mean. A blade grinder will technically work but the grind will be uneven, with some powder and some chunks. In a pinch, a food processor can do it too — we cover that in our guide on whether you can grind coffee beans in a food processor.
The cold brew ratio explained
This is the part where most recipes confuse people. There is no single “right” cold brew ratio — there are two, depending on whether you want concentrate (to dilute later) or ready-to-drink (sip straight from the jug).
| Style | Coffee : Water | Use case | How to drink |
|---|---|---|---|
| Concentrate | 1:4 (1 cup grounds : 4 cups water) | Make-ahead, batch brewing, café-style strength | Dilute 1:1 with water, milk, or ice |
| Ready-to-drink | 1:8 (1 cup grounds : 8 cups water) | Sip straight, no dilution | Pour over ice as-is |
By weight, that is roughly 1:4 concentrate = 100g coffee to 400g water, or 1:8 ready-to-drink = 100g coffee to 800g water. Most home brewers prefer the concentrate route because it gives you flexibility — you can make it stronger by adding less water, weaker by adding more, and it keeps better in the fridge.
If you are scaling the recipe, our guide to how many coffee beans per cup has the gram-by-gram breakdowns to plan your batch size.
Step-by-step: how to make cold brew in a mason jar
This is the classic no-equipment method. If you have a jar and a strainer, you can start brewing in five minutes.
You will need
- 1 cup (about 100g) coarsely ground coffee
- 4 cups (about 1 litre) cold, filtered water
- A 1.5L or 2L mason jar with lid
- A fine-mesh sieve
- A paper coffee filter, cheesecloth, or paper towel
- A second clean jar or pitcher
Method
- Add the grounds to the jar. Tap it on the counter to settle them flat.
- Pour in half the water slowly. Watch it bloom — the grounds will swell and release CO2. Wait 30 seconds.
- Stir gently. Use a long spoon to make sure every ground is wet. Dry pockets will not extract.
- Add the remaining water. Stir once more, then seal the lid.
- Refrigerate for 16 hours. Set a timer or leave it overnight. 12 hours is the minimum, 24 hours is the maximum before bitterness starts to creep in.
- Strain through a fine-mesh sieve into your second jar. This removes the bulk of the grounds.
- Filter again through a paper filter or cheesecloth. This removes the fine sediment that makes cold brew gritty. Do not skip this step — even if it takes 10 minutes to drip through.
- Discard the spent grounds (or save them for the garden — they are excellent compost).
- Seal and refrigerate. Your cold brew is ready to drink. See the storage section below for how long it lasts.
That is the whole process. You can adjust the steep time and ratio to taste once you have done it a few times.
How long to steep cold brew
Steep cold brew for 12 to 24 hours, with 16 hours being the sweet spot for most beans. Steeping at room temperature is faster (8–12 hours) but produces a slightly more acidic cup. Refrigerator steeping is slower but cleaner-tasting and what most home brewers prefer.
| Steep time | Result | Best for |
|---|---|---|
| 8 hours | Light, slightly under-extracted, tea-like | Light roasts, lower caffeine |
| 12 hours | Smooth, balanced, easy to drink | Most beginners |
| 16 hours | Sweet spot — full body, chocolate notes pop | Medium-dark roasts |
| 20 hours | Strong, bold, slight edge of bitterness | Diluting with milk for iced lattes |
| 24+ hours | Often bitter, over-extracted, harsh finish | Generally avoid |
Past 24 hours, the bitter compounds start to dominate and the flavour profile shifts in a direction most people do not like. If you forget your batch and steep for 36 hours, do not pour it down the drain — try diluting it heavily with milk and ice. Cold brew is forgiving.
How to make cold brew in a French press
If you already own a French press, you do not need a separate cold brew maker. The plunger and mesh filter work brilliantly for cold brew — and the process is even simpler than the mason jar method because there is no second straining step.
- Add coarse grounds to the French press carafe (1 cup grounds per 4 cups water for concentrate).
- Pour in cold water and stir gently to wet all the grounds.
- Place the plunger on top but do not press down. Just let it rest above the water line — this keeps the grounds submerged.
- Refrigerate for 16 hours.
- Press the plunger down slowly when ready. The mesh filter traps the grounds.
- Decant immediately into a clean jar — do not leave finished cold brew sitting in contact with the grounds, or it will keep extracting and turn bitter.
One thing to keep in mind: French press mesh is slightly coarser than dedicated cold brew filters, so a small amount of fine sediment is normal. If that bothers you, decant through a paper filter as a final pass. For more on getting the most out of a French press, see our guide to the best coffee for French press and our piece on how to make espresso with a French press — the same kit, three completely different drinks.
Cold brew concentrate: making, diluting, storing
Concentrate is cold brew brewed at a stronger ratio (1:4) than ready-to-drink (1:8), specifically so you can dilute it later. It is the smarter way to brew at home for three reasons:
- Storage: Takes up half the fridge space — important if you are batching for the week.
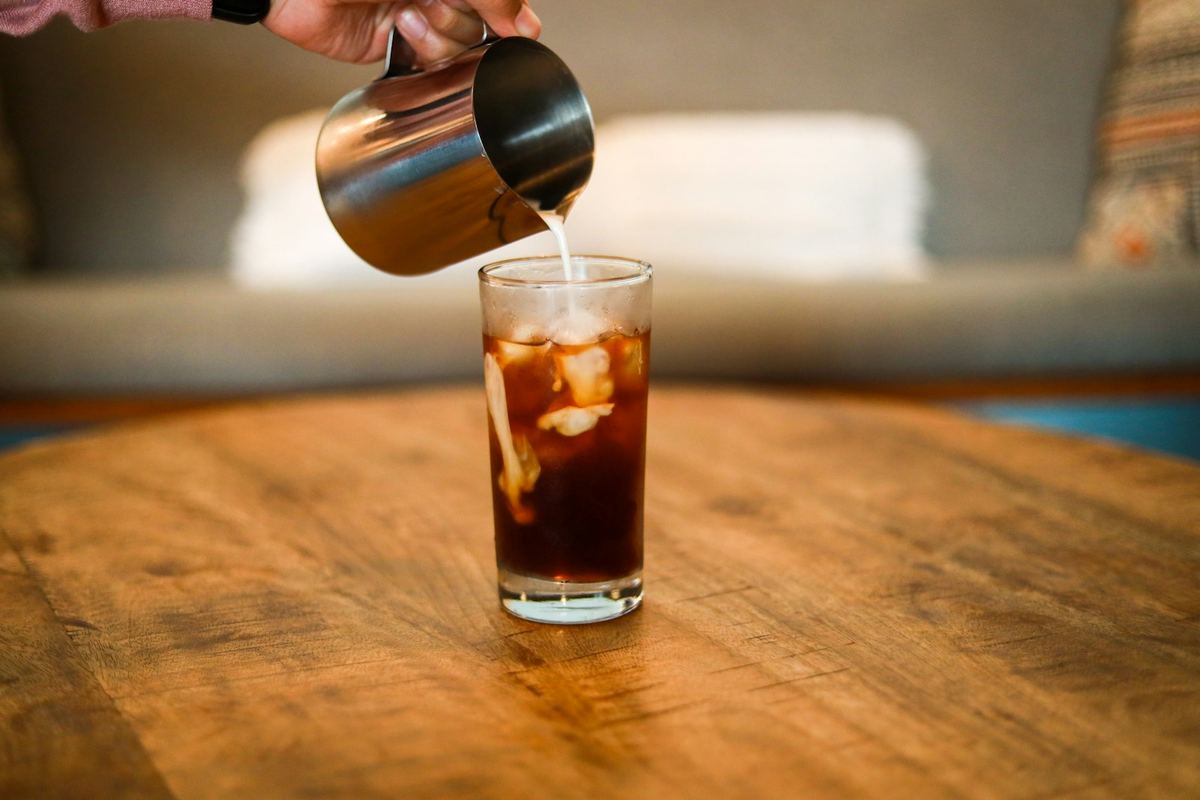
- Flexibility: Use the same batch for iced lattes (1:1 milk), iced Americanos (1:1 water), or sip it black after a heavier dilution.
- Shelf life: Concentrate keeps fresher for longer than diluted brew because there is less water for flavour compounds to break down in.
How to dilute cold brew concentrate
| Drink | Concentrate | Dilution |
|---|---|---|
| Black iced coffee | 1 part | 1 part water + ice |
| Iced latte | 1 part | 1 part cold milk + ice |
| Iced Americano | 1 part | 2 parts water + ice |
| Strong “Death Wish” style | 1 part | 0.5 parts water + ice (or neat) |
Start at 1:1 and adjust to your taste. Some people like cold brew much weaker than that. Others drink the concentrate undiluted over ice — and at roughly twice the caffeine of a regular cup, you will feel it.
How long does cold brew last?
Cold brew lasts 7 to 14 days in the fridge when stored in an airtight container. Concentrate lasts longer than diluted brew because there is less water for oxidation and flavour breakdown.
| Type | Fridge life | Peak window |
|---|---|---|
| Concentrate (1:4), sealed | Up to 2 weeks | Days 1–7 |
| Ready-to-drink (1:8), sealed | 7–10 days | Days 1–5 |
| Diluted with milk | 2–3 days | Drink the same day |
| At room temperature | 1 day max | Refrigerate immediately |
The flavour starts to degrade before the brew becomes unsafe to drink. After day 7, you may notice the cup goes from “smooth and chocolatey” to “flat and slightly stale”. It is still drinkable — it just is not as good. Use a glass bottle with a tight lid for the longest shelf life. Plastic bottles can pick up off-flavours over time.
How much caffeine is in cold brew?
This is where it gets interesting. An 8-ounce cup of ready-to-drink cold brew contains around 100–200mg of caffeine. Concentrate, undiluted, can hit 300mg or more in the same serving size.
| Drink (8 oz) | Typical caffeine |
|---|---|
| Drip coffee | 95 mg |
| Espresso shot (1 oz) | 63 mg |
| Cold brew, ready-to-drink (1:8) | 100–200 mg |
| Cold brew, concentrate (1:4) — undiluted | 200–300+ mg |
| Cold brew, concentrate diluted 1:1 | ~150 mg |
Cold brew has more caffeine than drip coffee made from the same beans because the brew ratio uses more coffee per cup of water. The long steep time also extracts caffeine very efficiently — even though the water is cold, 16 hours of contact more than makes up for it. For a side-by-side with espresso, see our breakdown of how much caffeine is in a shot of espresso.
Is cold brew stronger than regular coffee?
It depends what you mean by “stronger” — flavour or caffeine.
By caffeine, yes — usually. Cold brew is almost always brewed at a higher coffee-to-water ratio than drip coffee, so even when diluted to drink, it has more caffeine per cup. Concentrate is significantly stronger.
By flavour intensity, no — it is smoother. Cold water extracts only about 65% of the bitter and acidic compounds that hot water extracts. So cold brew tastes mellow and sweet, even when it is loaded with caffeine. People often describe it as “smoother than iced coffee” — that smoothness is the lower acidity, not the lower caffeine.
This combination — high caffeine, low bitterness — is why cold brew became so popular. It hits hard without tasting harsh.
Troubleshooting weak, bitter, or sour cold brew
If your first batch does not taste right, do not give up. Cold brew is dialled in by adjusting one variable at a time. Here is what to change and in what direction:
| Problem | Likely cause | Fix |
|---|---|---|
| Weak and watery | Ratio too dilute, or under-steeped | Use more grounds (try 1:5) or extend steep to 20 hours |
| Bitter and harsh | Grind too fine, or over-steeped past 24 hours | Use a coarser grind and cap steep at 16 hours |
| Sour or “off” | Stale beans, or temperature too warm during steep | Use fresher beans, refrigerate during brew |
| Gritty / sludgy | Skipped the second filtration step | Always pass through paper filter or cheesecloth at the end |
| Flat / boring flavour | Beans too old, or roast too light | Switch to a medium-dark roast, check roast date |
| Tastes like dishwater | Way too much water, or stored too long | Adjust to 1:4 concentrate, drink within 7 days of brewing |
The two most common mistakes are using a grind that is too fine and over-steeping. Both lead to bitterness. If you only fix one thing, fix the grind — make sure it is properly coarse before you adjust anything else.
Watch: a deeper dive on cold brew
If you want to nerd out on cold brew further, James Hoffmann’s video covers the science of extraction, the variables he tested, and why his cup tastes the way it does. It is the most thorough free explainer on the internet and worth 20 minutes of your time.
The bottom line
Cold brew rewards patience over precision. Get the grind coarse, get the ratio right (1:4 for concentrate, 1:8 for ready-to-drink), give it 16 hours in the fridge, and filter properly. That is the entire formula. Once you have brewed two or three batches, you will start dialling in your own preference — a touch finer for stronger body, a longer steep for darker beans, a different ratio if you drink it with milk.
The cold brew you make at home, with beans within their roast window and a steep dialled to your taste, will be better than almost anything you can buy in a bottle. And it costs a fraction of a daily café visit. The hardest part is remembering to start it the night before.
Frequently Asked Questions About Cold Brew Coffee
1:4 by weight (1 cup grounds to 4 cups water) makes concentrate to dilute later. 1:8 makes ready-to-drink. Most people prefer 1:4 because it gives you the flexibility to dilute for different drinks and it keeps longer in the fridge.
12 to 24 hours, with 16 hours as the sweet spot for most beans. Steeping less than 12 hours produces a thin, tea-like cup. Past 24 hours, bitterness starts to creep in as over-extracted compounds dominate the flavour.
Refrigerating is recommended. Room-temperature steeping is faster (8 to 12 hours) but produces a slightly more acidic cup and a shorter fridge life after. Fridge-steeped cold brew is cleaner-tasting and what most home brewers prefer.
Yes, but medium-to-dark roasts with chocolate or nutty notes work best. Light roasts can taste flat and tea-like when brewed cold. Brazilian, Colombian, and Sumatran beans are reliable starting points if you are not sure what to buy.
You will get a bitter, over-extracted cup with heavy sediment. Fine grounds expose too much surface area during the long steep, pulling out bitter compounds that coarse grounds leave behind. The fix is to use a properly coarse grind (sea salt texture) on the next batch.
Concentrate is brewed at a 1:4 coffee-to-water ratio and meant to be diluted with water, milk, or ice before drinking. Ready-to-drink is brewed at 1:8 and sipped as-is, no dilution. Concentrate is more flexible and keeps fresher in the fridge, which is why most home brewers prefer it.
Cold brew vs iced coffee is a separate question — our side-by-side breakdown covers it. Ready to upgrade your kit? See the best cold brew makers, and pair them with the best beans for cold brew. Your cold brew concentrate also makes a great base for protein coffee if you blend in a scoop of protein powder. More in the coffee drinks hub.

Hey there! I’m Austin and I love coffee. In fact, I drink about 5 americanos a day. I started BrewingCoffees because I wanted to share my love of coffee with the world. Before starting BrewingCoffees, I worked as a Barista for 7 years.
Leave a Reply